
How to: Simulate the Sintering of Ceramics
Sintering of high-tech ceramics Si3N4.
Requires Termica Neo version 1.1 or later.
1. Introduction
Firing of ceramics has some specific features, which must be taken into account during the sintering.
The main feature is the changing of the physical properties during the sintering process. It happens during the sintering process because the physical properties of the green body differ from the physical properties of the sintered material.
The first of changing properties is the density, the changes of which can be shown during dilatometer measurements and presents strong densifications of ceramics. For example, the silicon nitride has the decreasing of its linear sizes about 17%, and it corresponds to the increasing of the density during process by more than 40%.
The second property, which has big changes during process, is the thermal conductivity. For the green body of silicon nitride this value is 0.5 W/(m*K), but for the sintered ceramics it is 13 W/(m*K), what is more than 25 times higher. Such big changes must be taken into account during the sintering process.
2. Create New Project in Termica Neo
Start Termica Neo.
In the main ribbon of the top of the Termica Neo main window select File - New - New Project with Materials:

3. Check Initial Reactant and Final Product in the Material Library
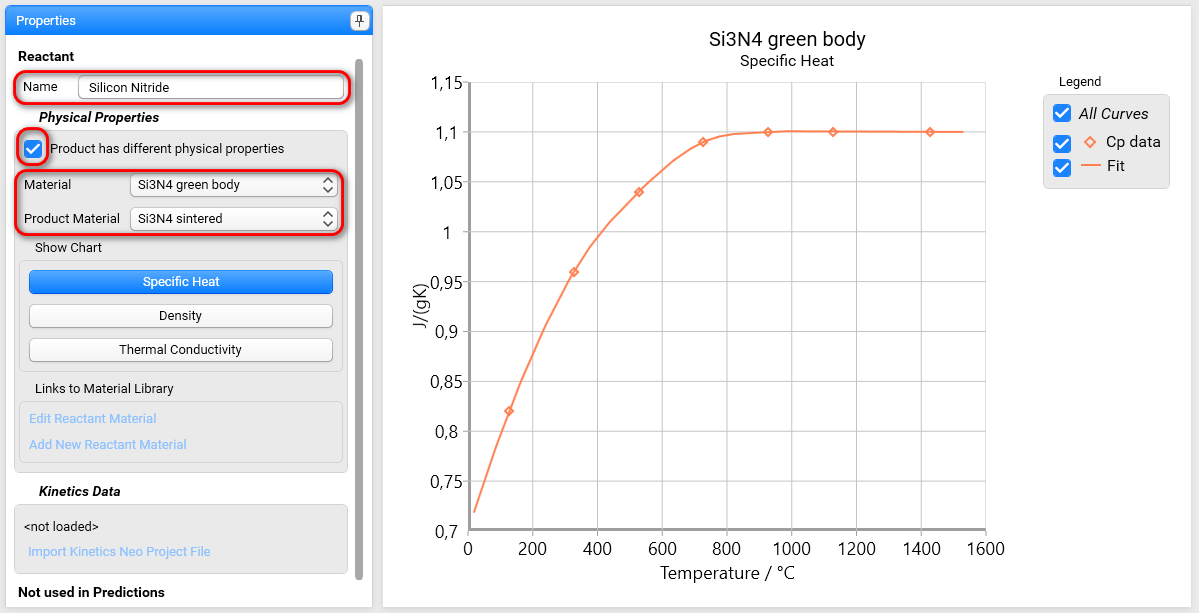
In order to use different properties of reactant and product, we will check, if these two materials with different properties are already present in the material library.
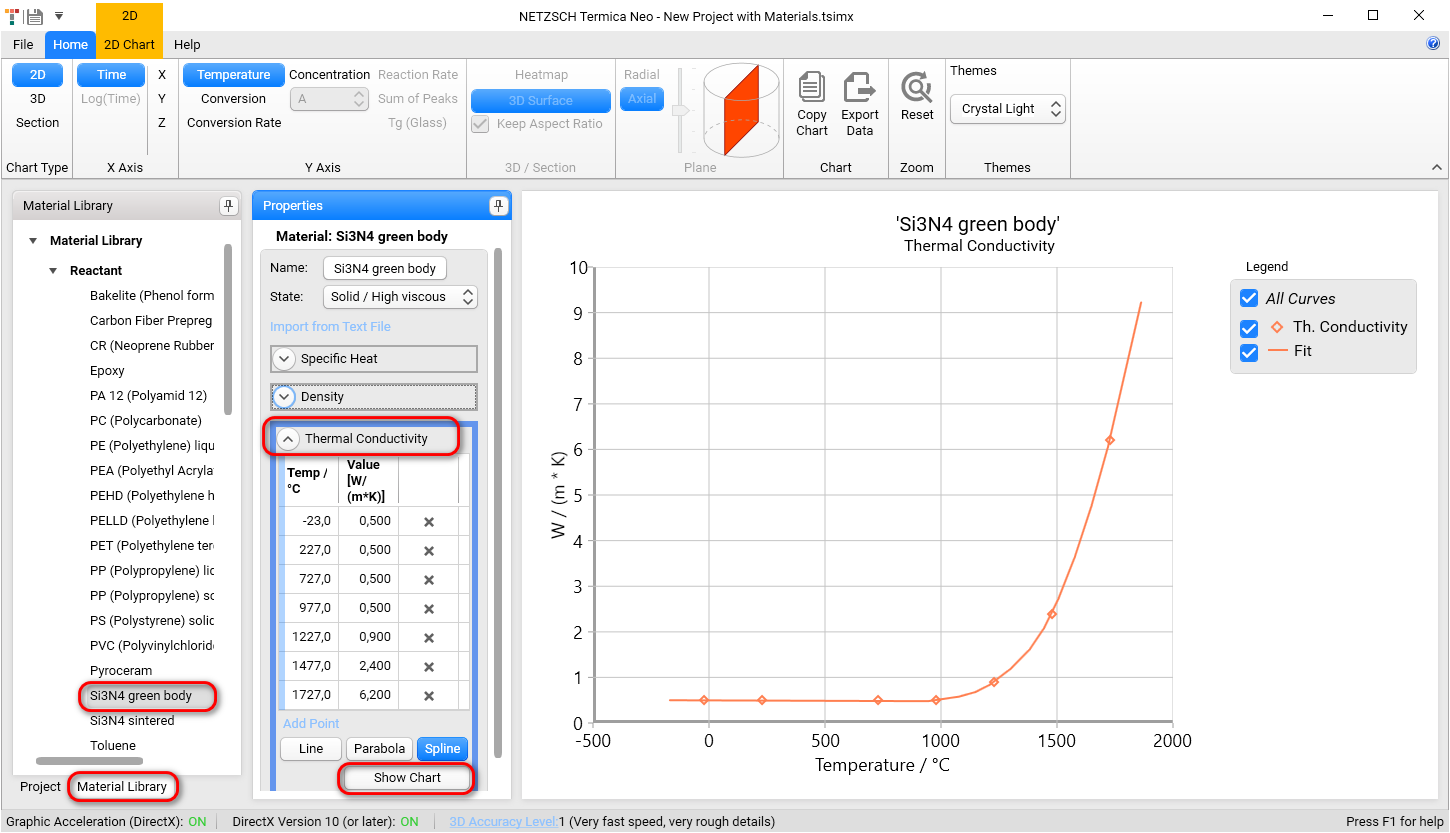
For initial reactant please go to Mateial Library in the left panel, select material Si3N4 green body in Reactant section and show its Thermal conductivity clicking on Show Chart. The thermal conductivity for green body is equal to 0.5 W/(m*K) for the temperatures below 1000 °C.
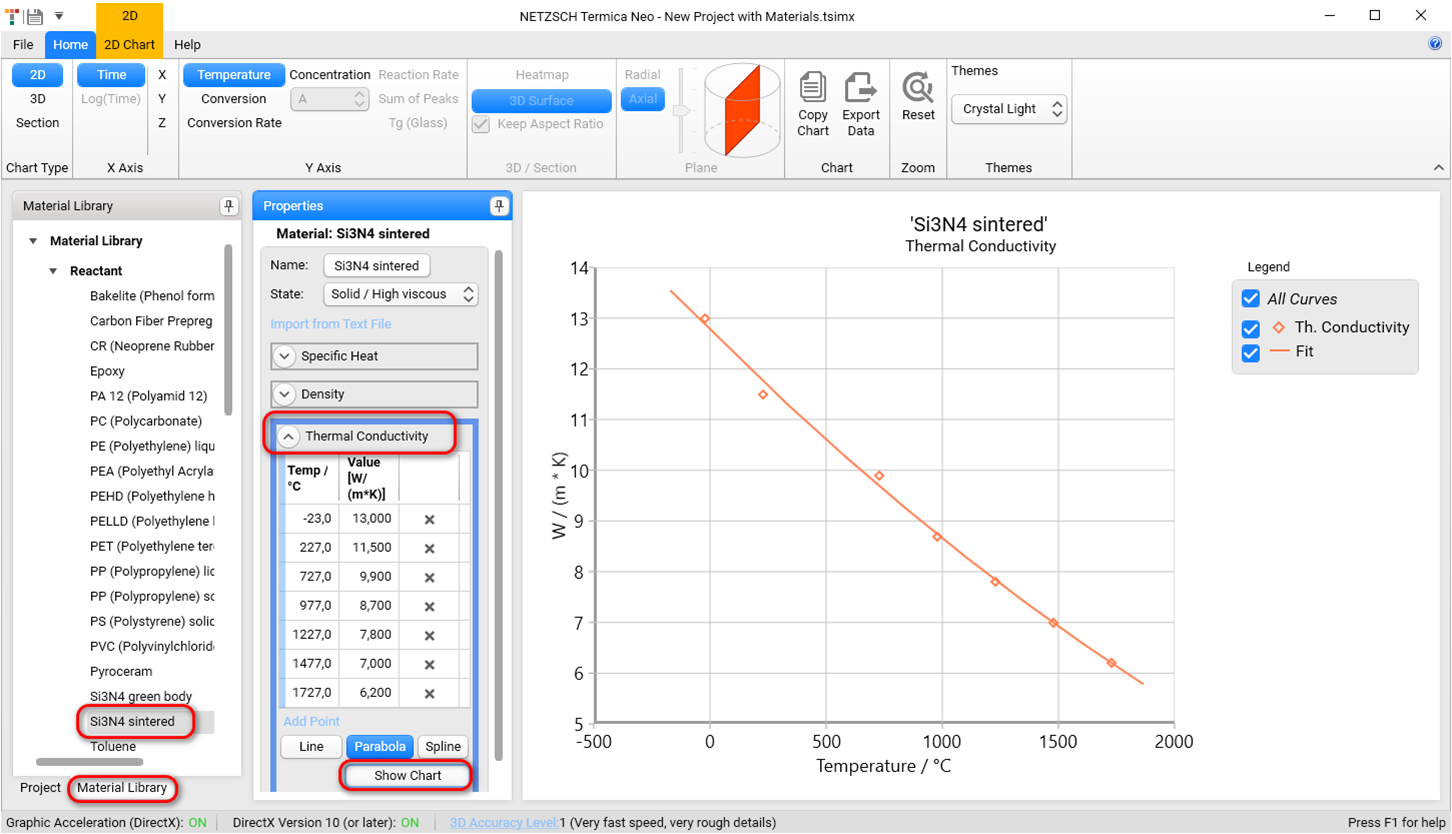
For final product please go to Mateial Library in the left panel, select material Si3N4 sintered in Reactant section and show its Thermal conductivity clicking on Show Chart. The thermal conductivity for green body is equal to 13 W/(m*K) at the temperatures -23°C. The thermal conductivity for the sintered product is 25 times higher than the thermal conductivity for the green body:
4. Check the Thermal Radiation for Ceramics in the Material Library
Let us see, if the material with the emissivity coefficient is present in the material library. We will use this material for the surface in order to have thermal radiation from it.
For the properties of thermal radiation on the surface please go to Material Library in the left panel, select material Si3N4 with radiation in Container section and check its Emissivity value:
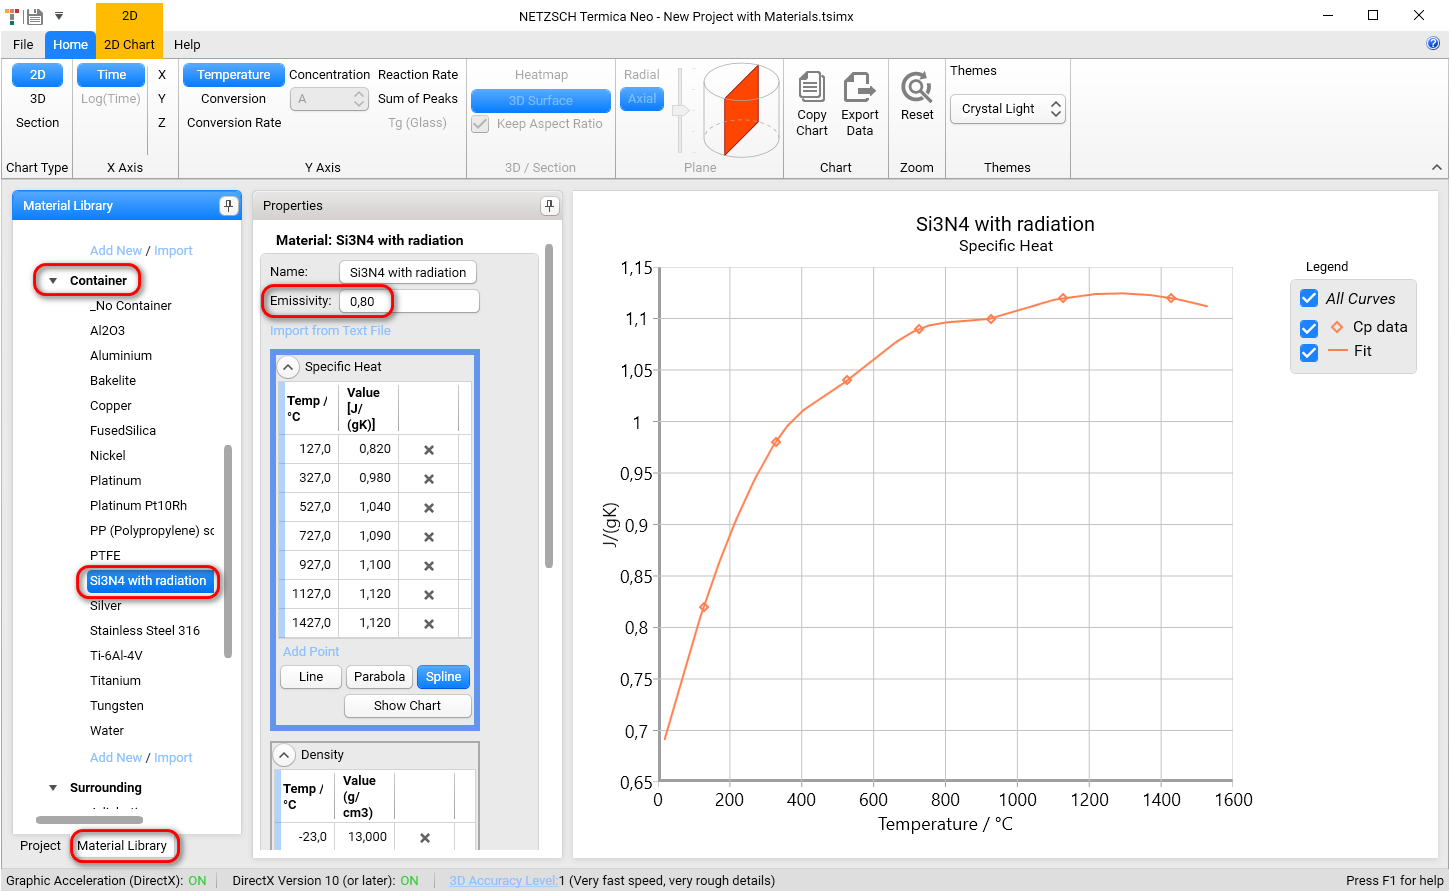
The emissivity 0.80 we will use in the simulation of ceramic sintering.
5. Create New Reactant with Different Physical Properties for Initial and Final Materials
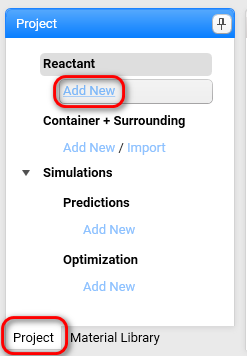
Return to the Project panel and click on Add New in Reactant Section:
Write Reactant Name and select checkbox Product has different physical properties.
Select Si3N4 green body for Material text field as the initial non-sintered material.
Select Si3N4 sintered for ProductMaterial text field as the final sintered ceramics.
Both these materials will be used in the simulation of sintering process where the material changes its physical properties from green body to the sintered ceramics.
In the section Kinetics Data click on Import Kinetics Neo Project File:
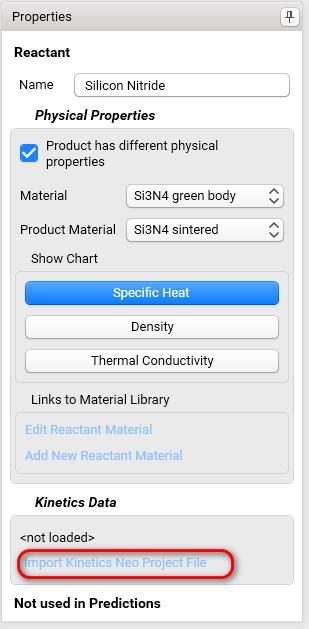
Then select kinetic project file Si3N4.kinx2 from the directory:
C:\Users\Public\Documents\NETZSCH\Termica Neo\Samples\Si3N4_Sintering
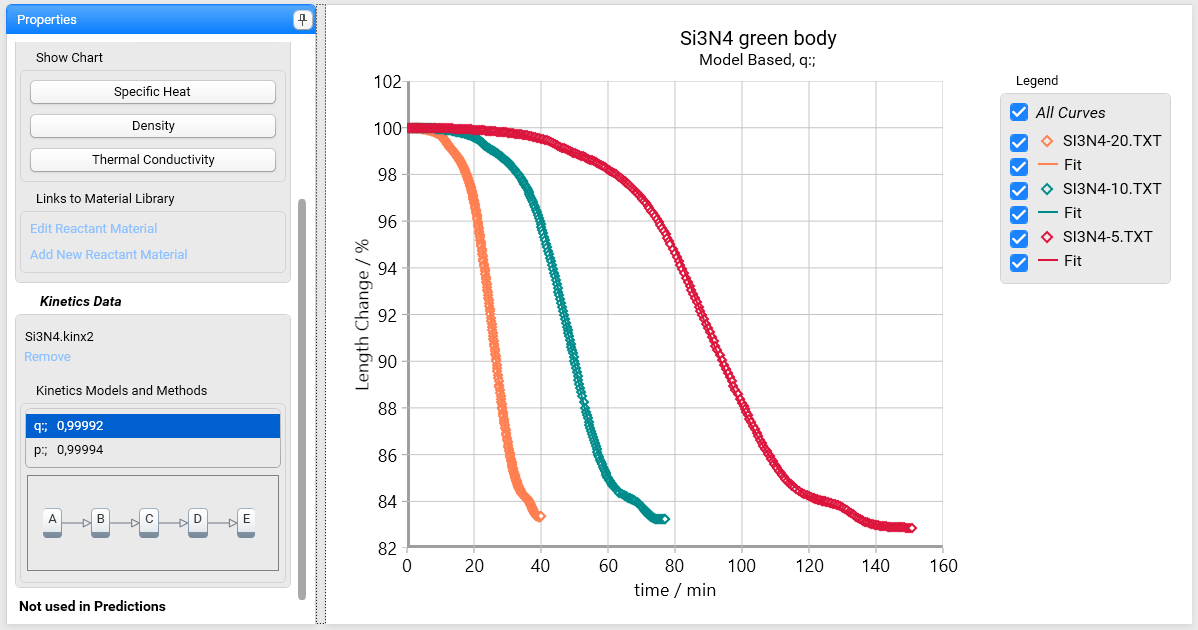
Project contains two kinetic models. Let us use four-step kinetic model with name “q” and R²=0.9992.
6. Create Container and Surrounding
On the Project panel select Add New in Container+Surrounding section to create the new container item, and then set the container properties as the following:
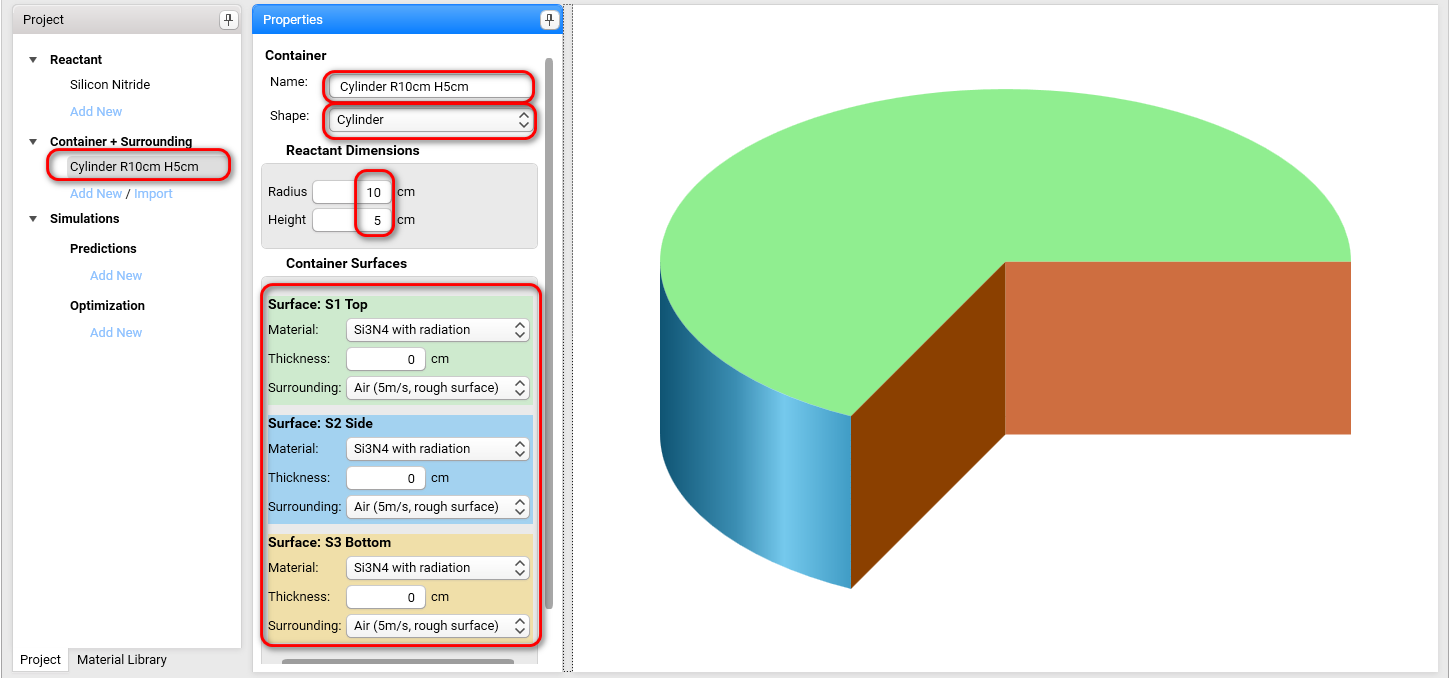
For surface properties the material Si3N4 with radiation is selected, in order to have thermal radiation from the surface during the simulation.
7. Create Prediction
On the Project panel select Add new in Predictions section to create the new Prediction item, and then fill its properties as the following:
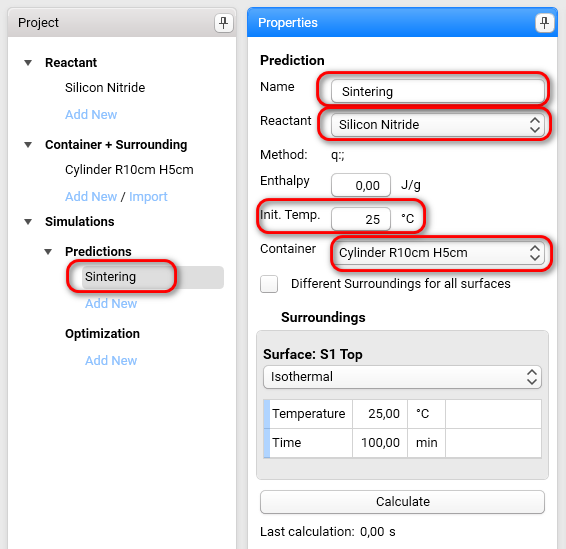
We will have the same surrounding temperatures for all surface of cylinder, therefore please keep unchecked the checkbox Different surrounding for all surfaces.
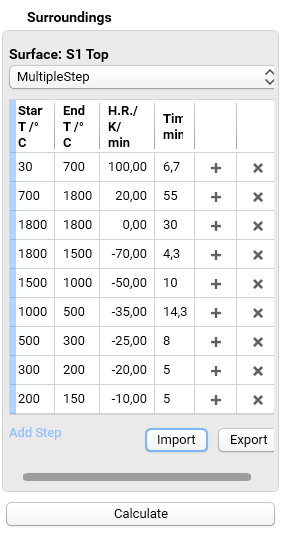
For Surface S1Top select Multiple Step from the drop-down list and click on Import:

Import the temperature program for the sintering process from the file Sintering_temperature.txt, the directory:
C:\Users\Public\Documents\NETZSCH\Termica Neo\Samples\Si3N4_Sintering
The imported temperature program is presented as the table:
8. Simulate Sintering Process
Please do the Simulation of the sintering process for this temperature program by click on Calculate below the imported table.
This simulation is done with 3D Accuracy Level=2. For the faster simulation you can select lower value of it in File -Settings. For more accurate (but more slow) simulation the value of this setting must be higher.
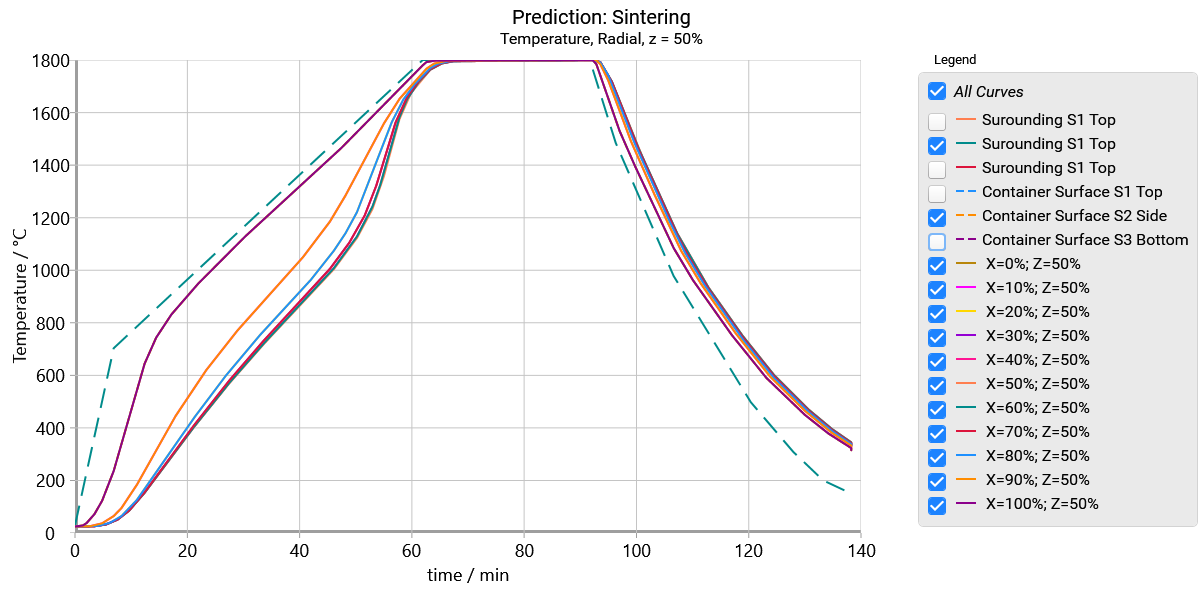
The simulation can be presented as the time-dependent temperatures (as well as conversion, conversion rates, concentrations) either for axial or for radial view.
The axial view presents the temperature on the vertical axis of cylinder depending on the vertical distance from the bottom:

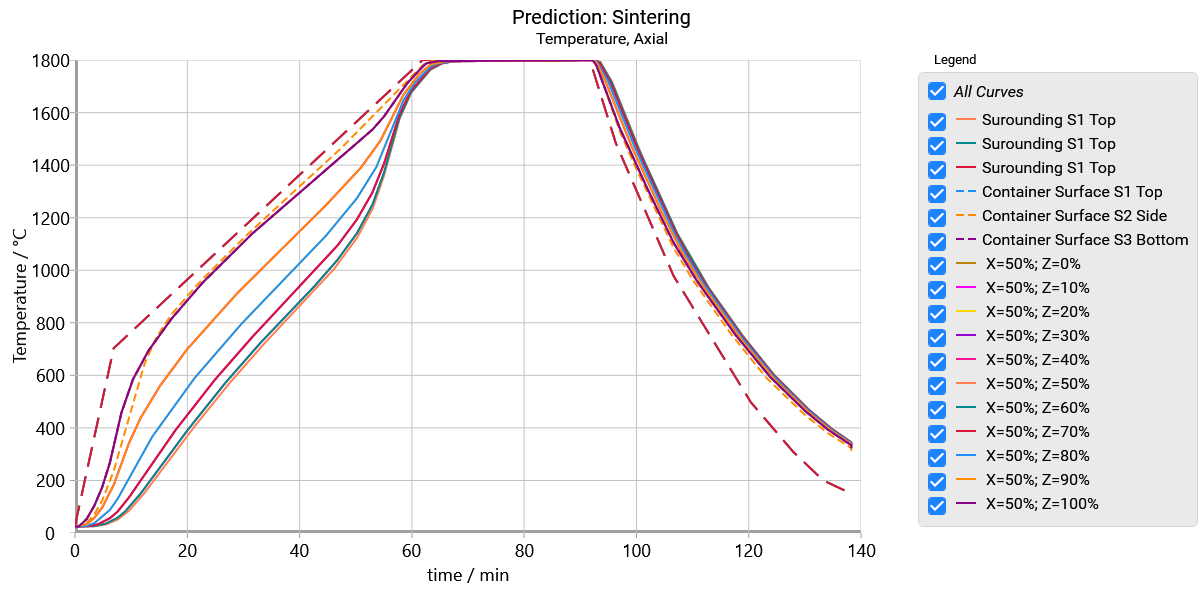
In the temperature range between 50min and 60 min the temperature curves of different height positions become to be closer to each other, because the sintering starts here and thermal conductivity of ceramics increases.
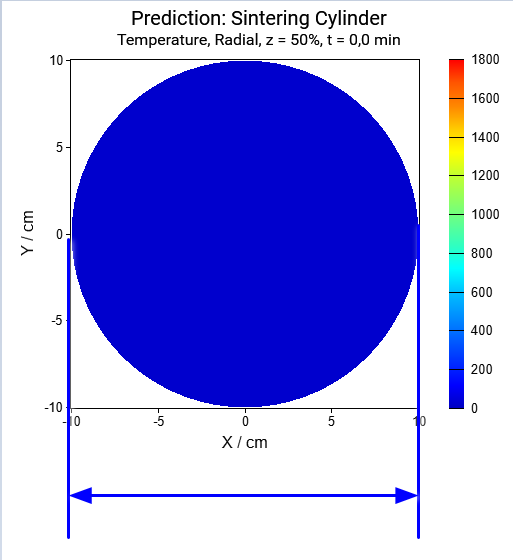
The radial view presents the temperature at the selected height of cylinder depending on the horizontal distance:
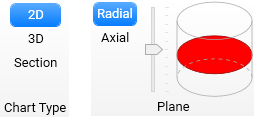
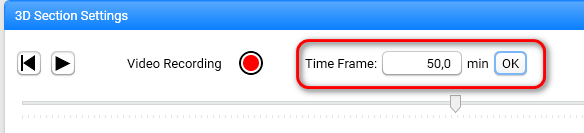
The Section view presents the selected cross-section as the color heatmap or 3D surface at the given time point.
Please select the time point in the bottom right panel 3D Section Setting:
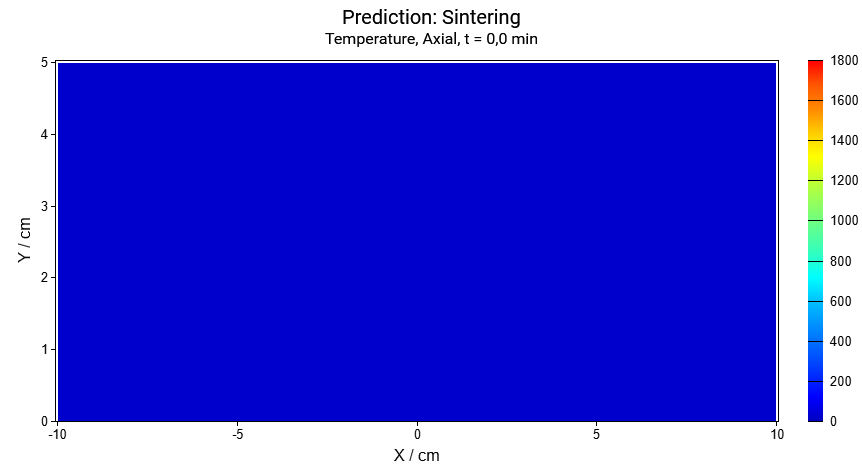
Here is the axial(vertical) cross-section is selected to show the temperature.

Vertical cross-section for the time points: t=0min, t=50min, t=95min:
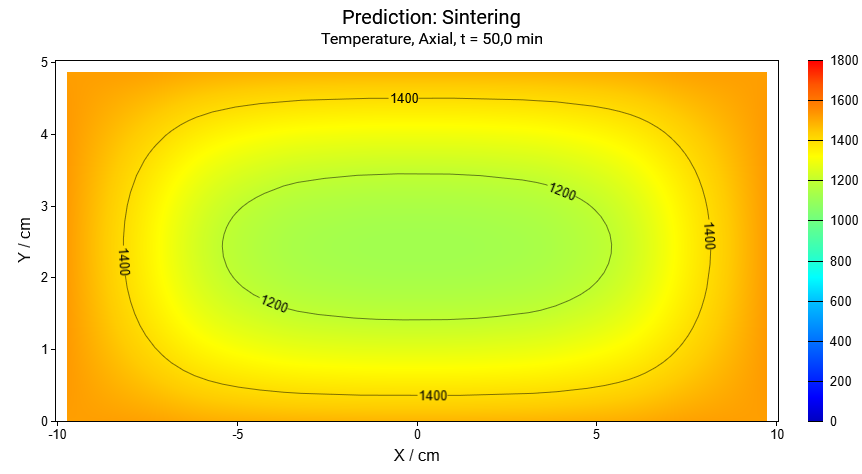
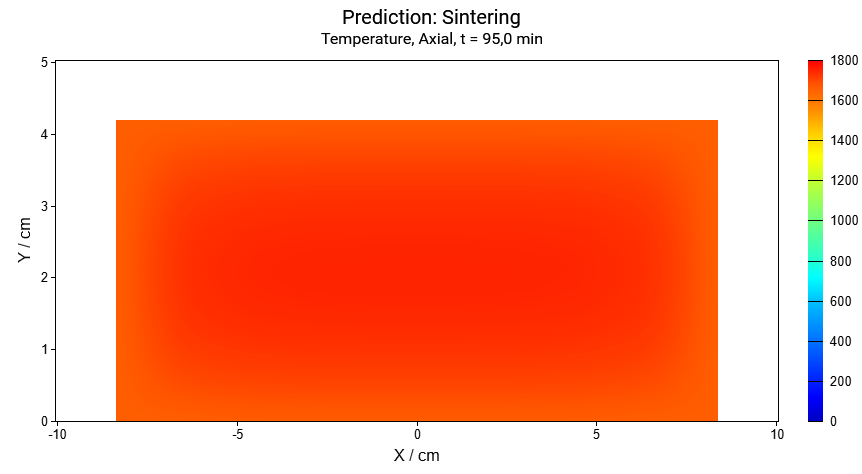
The cylinder height and the horizontal radius are decreased by 17% because of the shrinkage of material during densification.
Next results are the temperature for the radial(horizontal) cross-section:

Horizontal cross-section for the time points: t=0min, t=50min, t=95min:
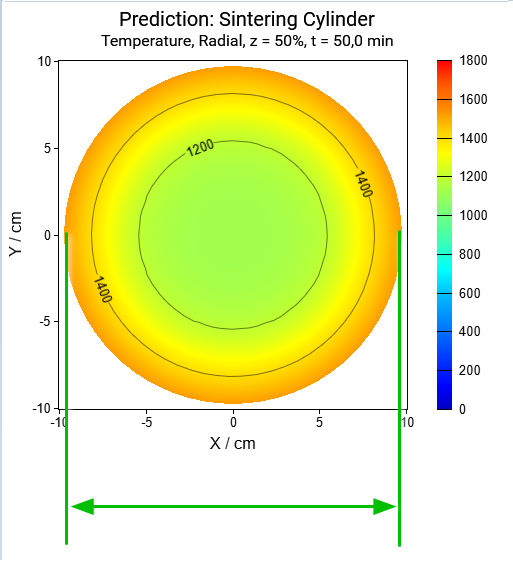
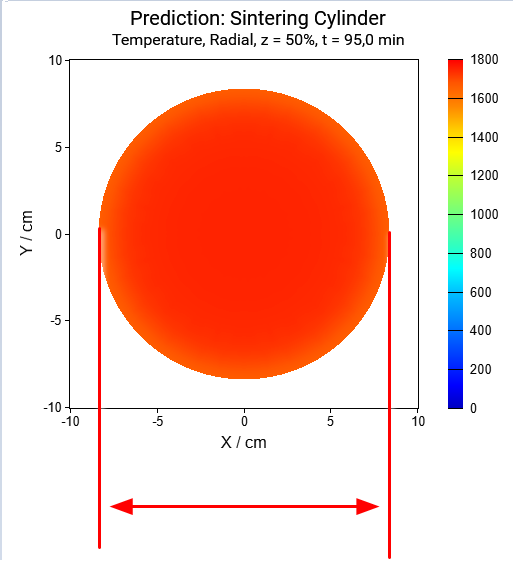
Again, the radius of cylinder decreases with the sintering process because of the shrinkage of material during densification.
The linear changes could be present because of two reasons:
- thermal expansion for materials with temperature-dependent density
- different density properties for initial material before reaction and final product after reaction (like in the current example)
The presentation for changing of the linear sizes is possible in Termica Neo software only for geometries, where material has no size limitation because of the presence of container. If the shape of reacting material is limited by container with non-zero walls, then the changing of the linear sizes is not shown.
If you would like to show linear changes, then please select either _NoContainer property for the container walls or select other container material (like in this example) with its thickness=0.
Additionally, the linear changes are shown for the container with non-zero thickness only at the Bottom surface.